Water Shader
Water shader works in URP only. There is no Built-In version of a Water shader in Flat Kit.
Water shader lets you create a stylized water surface. That’s is primary function. If you feel adventurous, you can make many other wobbling, glittering, weird things with it. It has a lot of parameters to fine-tune the look you want. Although this shader may look a bit complicated at first, it is intuitive and has helping tooltips on the parameters.
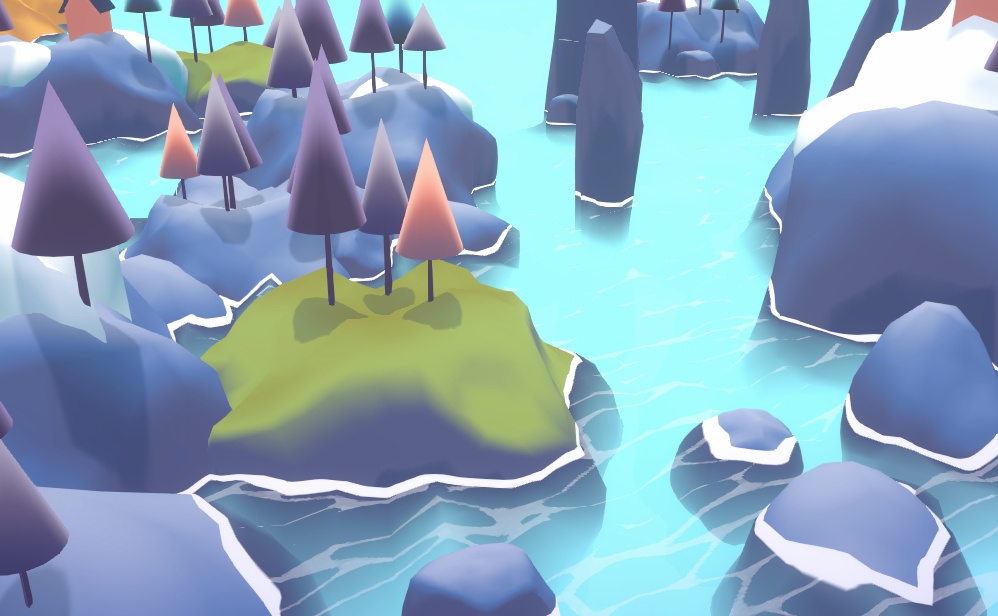
Please, look at the Ocean Water, Pool and Water Vessels demo scenes to see what you can do with it.
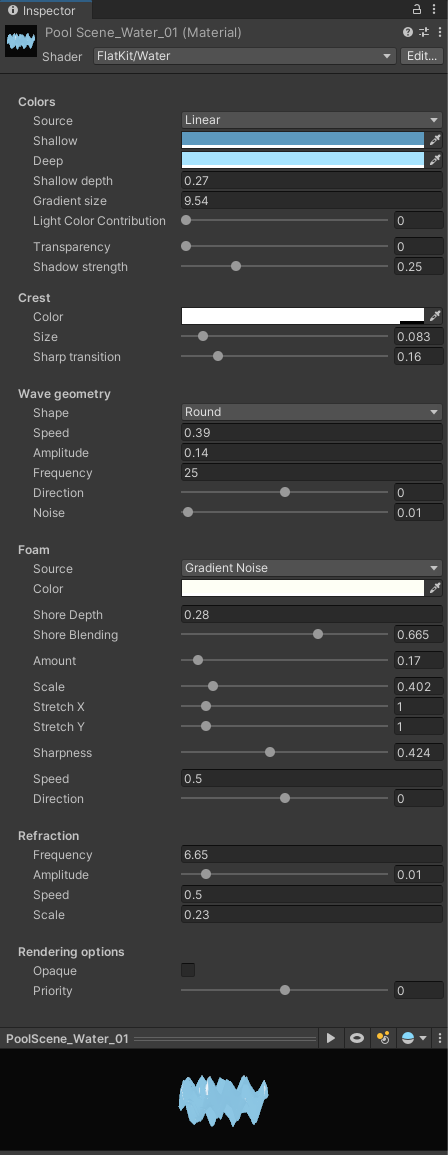
Water shader interface
First of all, you’ll need a surface to place a material with Water shader on. A plane with vertex grid will do fine. The more high resolution the water mesh is the smoother and well-defined the waves will be. For extra interest you can slightly displace the vertices while editing the mesh. With Flat Kit you get a few such models.
The controls are grouped into the logical sections. Let’s float through the parameters of the shader.
Colors
Source There are two modes of the color input — Linear and Gradient Texture.

Water color source dropdown
-
Linear. This one allows to use just colors for Shallow and Deep parts of water. This effect is simple one — just two colors.
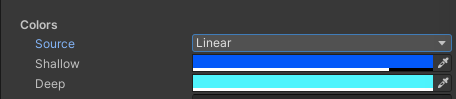
Water color source - linear
If Linear color source is chosen, two exclusive to this mode parameters appear to select colors:
-
Shallow. Color at the top of the water.
-
Deep. Color below the surface.
-
-
Gradient Texture. Use this one if you are looking for something fancy. You can create a depth gradient consisting of several colors. Using a Gradient Editor ramp, you can add up to 8 color stops onto the ramp. Now you have a Shallow color, Deep color and anything you want in between (see Pool demo scene).
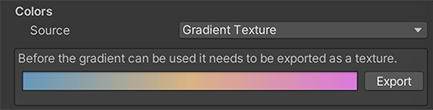
Water color source - gradient. Clicking on the color window opens the Gradient Editor
When you click on the white color field, the Gradient Editor will show up.
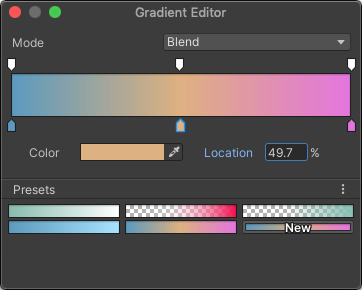
Gradient Editor. Edit the gradient and close the window, then save the texture
After you finished editing the color gradient, click the ‘Export’ button to save the texture somewhere on the disk. We recommend to name the textures with the names beginning on something like ‘water…’ or ‘awesome_gradient…’ because later you’ll have these textures stacked up one below another in the texture selection window, and it will be much quicker to scroll through them. When you have your texture saved, the material will be instantly filled with this gradient.

Export Button. Click it and save the texture to the disk
Shallow Depth. This is a lowest point of Shallow part. It is a point where Shallow part merges with the top of the gradient.
Gradient Size. This is the lowest (deepest) point of the gradient. It is a point where it merges with the Deep part.
Below is a little chart, which may came handy for understanding the parameters for the coloring part of the Water shader.
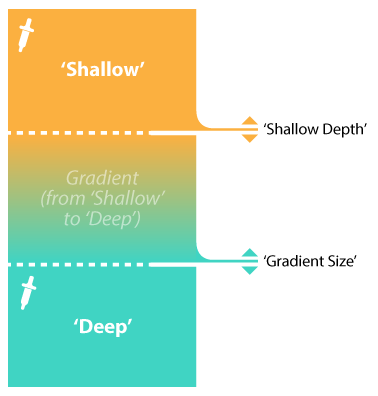
Water Gradient chart
Transparency. How clear (transparent) the color of the water is. The transparency doesn’t affect other parameters like foam or refractions. This allows you to achieve awesome weird optical effects.
Shadow Strength. How visible the shadow is.
Crest
Crest parameter colors the tips of the waves.
Color. The color of the wave. It helps accentuate individual waves.
Size. How big of a part of a wave is colored (accentuated).
Sharp transition. How smoothly the accentuated wave blends into overall color of the water.
Wave geometry
This section determines the overall shape of the waves. All the controls for the mesh displacement can be found here.
Shape. The formula that determine how the displacement of the waves is shaped and distributed across the mesh.
- None turns displacement waves off. As no waves are visible, the surface becomes flat.
- Round is linear (comb-looking) shape with rounded tips;
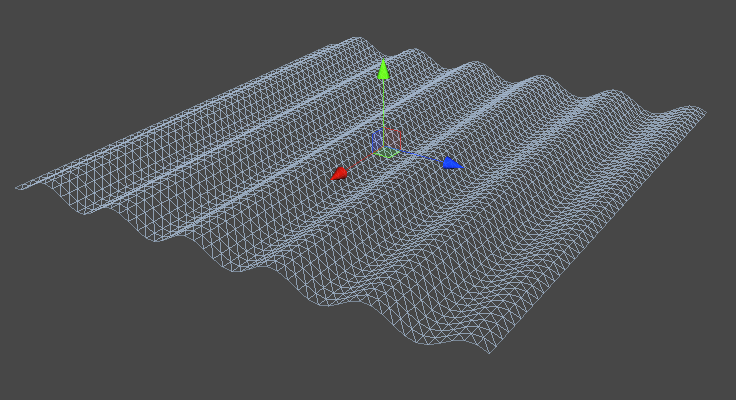
Shape parameter — ‘Round’
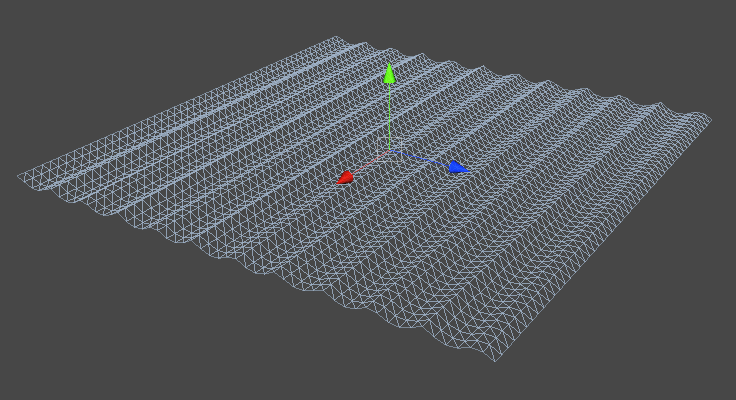
- Grid is grid-like (checkerboard-looking) shape;

Shape parameter — ‘Grid’
- Pointy is more linear (comb-looking) movement with sharp tips.
Shape parameter — ‘Pointy’
Speed. How fast it moves along the Direction parameter.
Amplitude. Sets deviation amount, or, how high it is. Use this parameter to set the height of the waves. Positive values ‘raise’ the waves effect above the base point, negative values make the waves lower than the initial base point.
Frequency. Density of the effect.
Direction. Direction of the motion. This parameter works tightly with Speed. Using these two you can make ponds, pools, seas etc (static water) and rivers, waterfalls etc (streaming water). Please note, there’s an independent set of parameters Speed and Direction for foam as well, described a bit further.
Noise. Adds nonlinearity to the Shape. Use it to make Grid, for example, more chaotic.
Foam
NOTE: In order to see the foam, the model must be UV-unwrapped.
Source. How the foam is being made — from texture or generated from noise. Please select one of the following parameters:
- None. Turns off the foam.
- GradientNoise. The foam shape comes from generative noise.
- Texture. If you choose Texture source, you’ll have an option to import your own, preferably seamlessly tiling, texture, or use one of the included ones — we shortlisted the best from dozens of originally pre-generated .png textures to come with Flat Kit. If you are planning to use your own textures, we suggest you to put them into a single (red) color in the import settings to save memory.
Color. Color value of the foam. Can be opaque or transparent.
Shore Depth. The maximum point where the water is detecting the edges to create a foam ‘outline’.
Amount. How often ‘grains’ occur.
Scale. How big the foam ‘chunks’ are.
Sharpness. How smooth or sharp the foam is.
Stretch X. How stretched the foam is along X axis.
Stretch Y. How stretched the foam is along Y axis.
TIP. Sometimes we find it useful to generously stretch the foam along one of the axis, so that the foam becomes a set of straight lines. This effect definitely can have its use.
Speed. How fast it moves along the Direction parameter.
Direction. Direction of the motion. This parameter works tightly with Speed. Using these two you can make ponds, pools, seas etc (static water) and rivers, waterfalls etc (streaming water)
Refraction
Use these parameters to control the optical distortion of the water.
Frequency. The frequency of noise that creates the refraction.
Amplitude. The deviation from the initial point.
Speed. How fast the refraction moves on the water.
Scale. How big is the noise that creates the refraction.
We included a component called Buoyancy. The Water shader deforms the water mesh, which in its turn moves the objects that have Buoyancy component on them. More info can be found in the Buoyancy part of Additional Scripts section of this manual.
TIP. Place the plane somewhere behind or in front of your scene objects. Place the Water shader on it. Set Clearness to max, set
foam scale to very high, lower the frequency, as well as opacity. With fine-tuning, it is possible to achieve something like a film grain effect.

Ocean Water Demo scene - preset ‘4’
Comments