Fog Image Effect
Fog Image Effect camera component can be reviewed as a post-processing effect. It can be subtle, like a mist in the lower part of the valley, or a dominant effect, as in a completely hazed environment. Simply put, it works in the following way. You decide whether you need only length fog or height fog or both. Then you determine the bounds where it would take effect. Then you choose colors along each dimension. And after that, blend between distance and height. This effect starts from camera position up to the Near/Far, Low/High bounds, meaning, your camera is the zero coordinate from where the fog spreads.
TIP In Built-In RP, because of the fact that image effects are usually placed on cameras, each camera on the scene can have a separate independent instance of an effect.
When you click on any of the color ramps (Distance or Height Gradient), the Gradient Editor pops up.
Fog Image Effect is being used in the Wanderer Demo scene (more subtly) and Valley Demo scene (more accentuated).
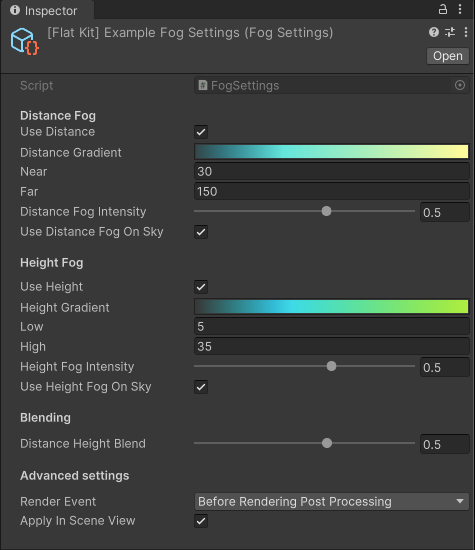
Fog Image Effect. Inspector panel interface
Parameters
Distance Fog
- Use Distance - whether to use fog along horizontal axis or not. If unchecked, the distance fog is not applied.
- Distance Gradient - gradient editor for distance fog. The bottom row of breakpoints (pointing up) is the selection of the colors. The above row (pointing down) controls the opacity of the area it points at; the opacity value of one breakpoint fades into the opacity value of the adjacent one. Same for colors. To open it, click on Distance Gradient or Height Gradient.
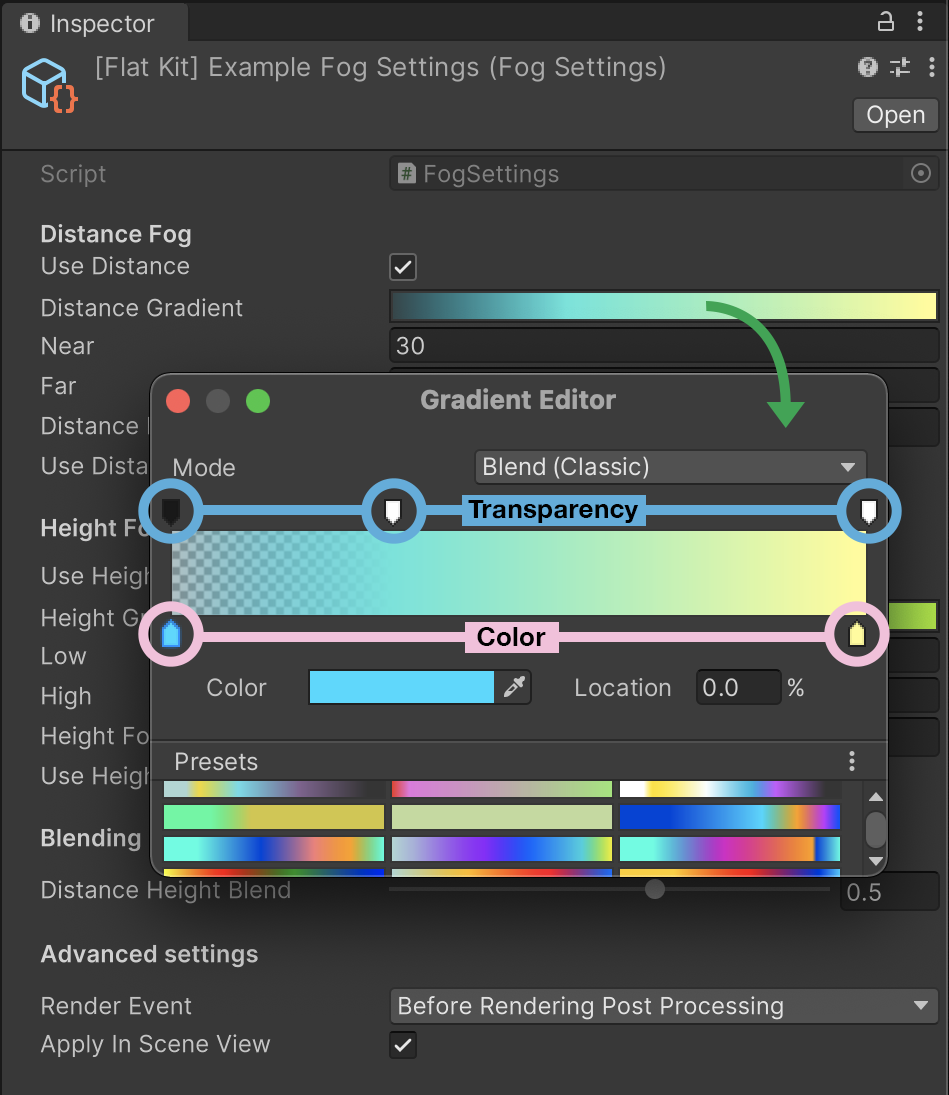
Fog Image Effect. Gradient Editor interface.
TIP. If you want the area close to you to be without fog, apart from increasing Near parameter, you can open up the color ramp(s), add a breakpoint next to the leftmost one on the ramp, select leftmost one, make it transparent (see screenshot of Gradient Editor below). The breakpoint you created (opaque, next to the transparent one) becomes your distance or height control.
- Near - distance from camera where the fog starts. The fog is not applied to the area closer to the camera than this value.
- Far - distance from camera where the fog ends. The fog is not applied to the area further from the camera than this value.
- Distance Fog Intensity - intensity of the distance fog. The higher the value, the more intense the fog is.
- Use Distance Fog On Sky1 - whether to use distance fog on the skybox or not. If unchecked, the distance fog is not applied to the sky.
Height Fog
- Use Height - whether to use fog along vertical axis or not. If unchecked, the height fog is not applied.
- Low - height from camera where the fog starts. The fog is not applied to the area lower than this value.
- High - height from camera where the fog ends. The fog is not applied to the area higher than this value.
- Height Fog Intensity - intensity of the height fog. The higher the value, the more intense the fog is.
- Camera Relative Position - Reverts fog behavior to pre-3.9.0. This is useful if you want to use the new fog settings, but want to keep the old look of your scene.
- Use Height Fog On Sky1 - whether to use height fog on the skybox or not. If unchecked, the height fog is not applied to the sky.
Blending
- Distance Height Blend - blend between distance and height fog. The higher the value, the more height fog is applied. The lower the value, the more distance fog is applied.
Advanced settings
- Render Event — the event at which the Fog effect takes place. Click on the drop down to select the event.
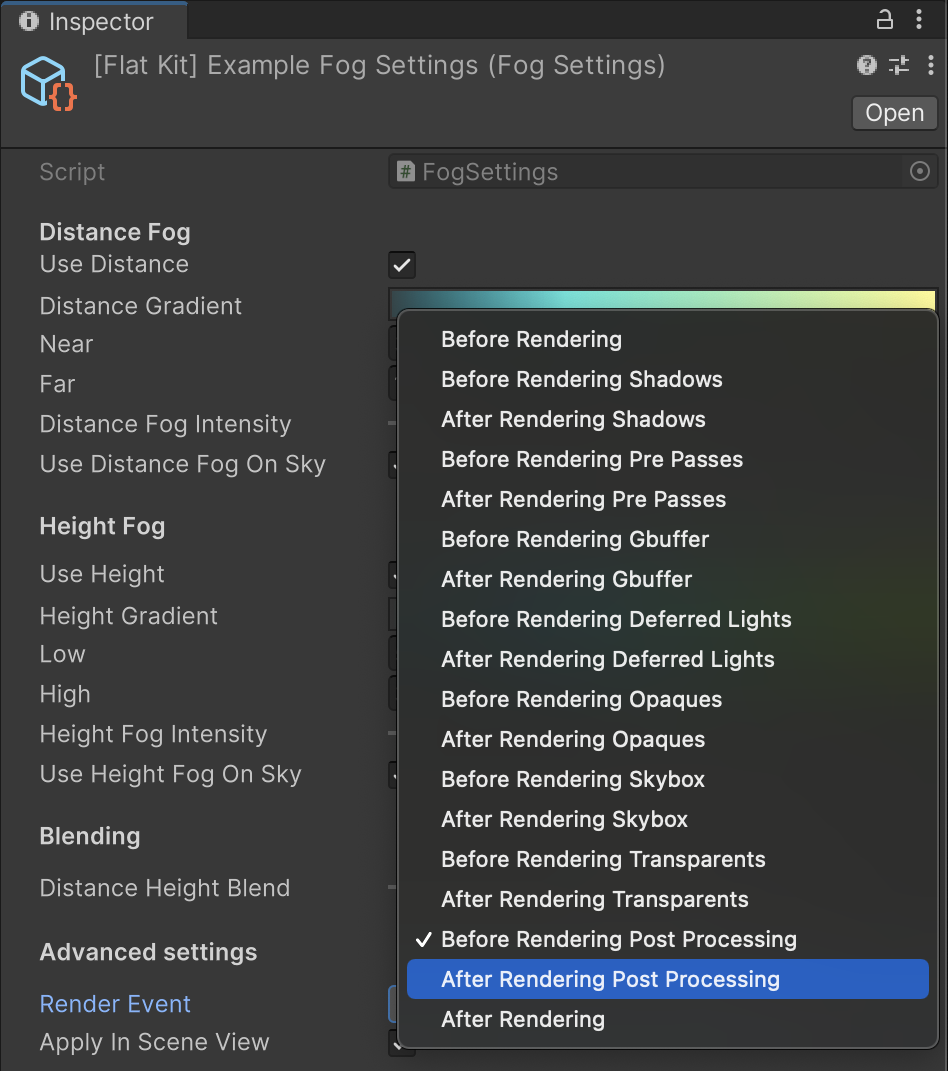
Fog Image Effect Render Events list.
- Apply in Scene View - whether the effect should be applied in the Scene view as well as in the Game view. Please, keep in mind that Unity always renders the Scene view with the default Renderer settings of the URP config.
Both Fog and Outline image effects can use image-based anti-aliasing, like the one in Unity’s Post-processing stack.
- In Universal RP (URP): post-processing effects are called ‘Renderer Features’ of the Forward Renderer.
- In Built-In RP: Post-processing is made of Camera effects placed onto the camera in the scene as Components.
Comments