Light Plane Shader
This shader is what we are particularly proud of. It looks like a small tool. But it has immeasurable possibilities. Fog, mist, delicate scene boundaries, light beams, glow of magic swords, laser beams. These things are what LightPlane is for.
The Wanderer demo scene includes LightPlane shader implemented not only as fog areas, but also as light beams of so-called pick-up objects and even as planets. The Valley demo scene has got the LightPlane shader used as floating air particles thanks to the Unity particle system.
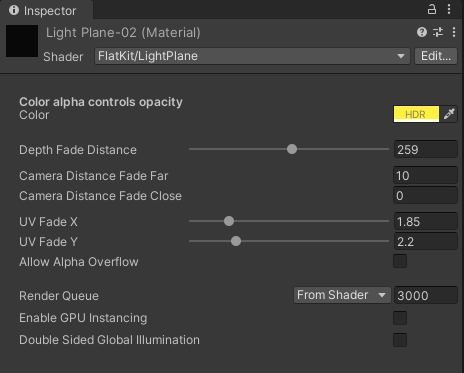
LightPlane Shader. Inspector panel interface
The parameters of the LightPlane shader are:
-
Depth Fade Distance controls how quickly the objects behind light plane become hidden. Imagine you are looking at a frosted glass window. Any objects that are very close to the window on the other side are clearly visible, but anything that’s far behind the window is completely blurred out. Depth Fade Distance defines how far the objects need to be from the window to become completely invisible.
-
Camera Distance Fade Close / Camera Distance Fade Far control distance range from the camera at which the light plane object transitions from transparent to opaque (see pic below).
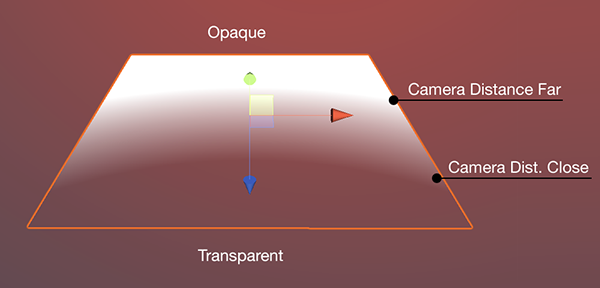
LightPlane — Camera Distance X and Y parameters
- UV Fade X controls transparency on the sides along X axis of the plane/mesh (see pic below);
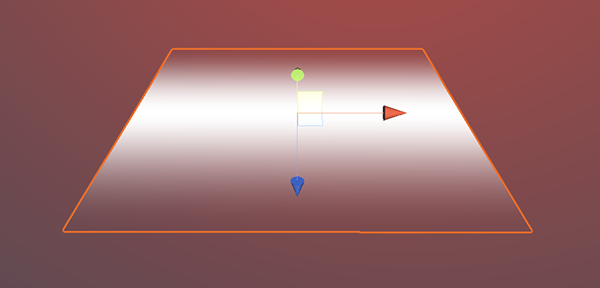
LightPlane — UV Fade X parameter
- UV Fade Y controls transparency on the sides along Y axis of the plane/mesh (see pic below);
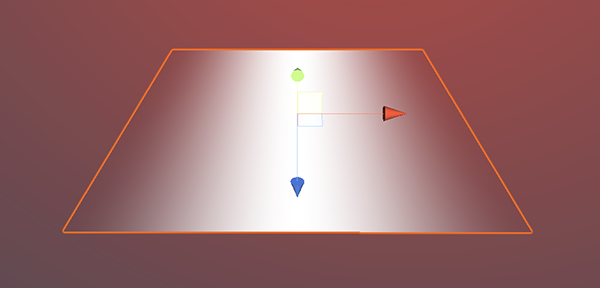
LightPlane — UV Fade Y parameter
When combined, UV Fade X and UV Fade Y can make a fluffy blob.
LightPlane — UV Fade X and UV Fade Y parameters combined
- Allow Alpha Overflow makes alpha more than ‘1’, used for HDR, looks nice with some bloom.
Comments